Blackout Curtain System
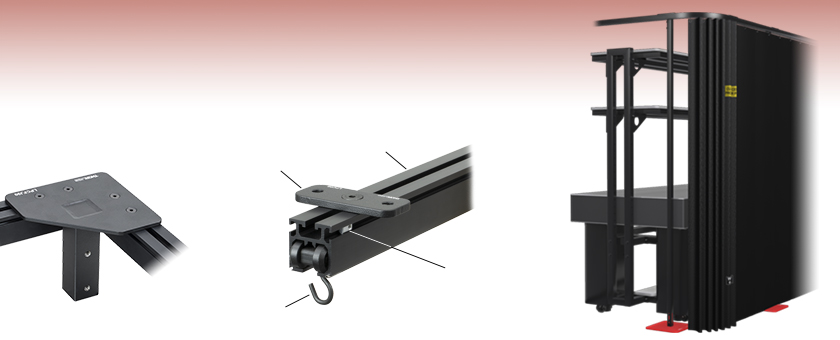
- Construct Custom Blackout Curtains Using Standard Parts
- Options for Wall, Floor, and Ceiling Mounting
- Modular Components Allow for Customization
Track Connectors Used to Attach Two or More Curtain Tracks Together
Curtain Tracks Available in Seven Lengths
Wheel Runners Allow for Quick and Easy Curtain Panel Adjustment
T-Nuts Mount Curtain Panels to Side of Track to Eliminate Light Gap
Ceiling Mounting Bracket Mounts Track Directly to Ceiling
Post for Attaching to Floor Mounting Column
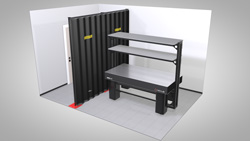
Example floor-mounted blackout curtain system assembled around an optical table.

Please Wait
Component Selection Process for Blackout Curtain System
| Step 1 Measure Space Dimensions |
Step 2 Select Tracks and Track Connectors |
Step 3 Select Curtains and Valances |
Step 4 Select Mounting Elements |
|||
 |
 |
 |
 |
Common Configurations for Floor- and Ceiling-Mounted Blackout Curtains
Features
- Lightweight Curtains to Block Light and Section off Room
- Curtain Tracks and Track Connectors Create a Path for Blackout Curtains to Follow
- Valance Panels to Cover Gaps Near the Ceiling or Curtain Tracks
- Individual Components for Mounting System to Walls, Ceilings, and Floors Using Mounting Brackets or Floor Columns
- Wheel Runners Allow for Quick and Easy Curtain Panel Adjustment
- Hardware Kit for Side-Mounting Curtain Panels to Eliminate Light Gap
- Hardware Kits for Mounting Valance Panels to Curtain Tracks or Rods
- Curtain End Stops Provide a Hard Stop Along Tracks
Thorlabs' Blackout Curtain System provides a modular, customizable assembly that can fit most lab spaces using a standard system of components. The blackout curtain system can be mounted directly to the floor, ceiling, or wall using our curtain tracks and other elements. For example configurations, see the tabs above. The blackout curtain system can be used at an entranceway or to blackout sections in a lab. All blackout curtain system components are sold separately below. This modularity enables easy replacement or modification to suit your setup.
Blackout curtain panels are 2.29 m long and are available in 1.45 m or 2.90 m widths. Multiple curtains can be joined together using hook-and-loop fasteners on the sides of each curtain, creating a light-tight seal. Blackout valance panels can be used to cover any gaps near the ceiling or curtain tracks. In addition, our blackout curtain and valance panels are NFPA 701- and BS 5867-certified fire resistant and provide zero to minimal transmission for a range of wavelengths and powers. For additional information on blackout curtain panel and valance certifications, please refer to the Certifications tab above.
To begin constructing a blackout curtain system for your lab, simply follow the steps outlined in the Component Selection Process to the right. Curtain tracks are available with seven length options to choose from, including a curved, 90° track. Various track connectors are provided to connect two, three, or four tracks together. Most track connectors also include mounting slots or additional brackets to help attach the curtain system to a wall, ceiling, or floor element. Dedicated wall, ceiling, or floor mounting adapters are also provided to secure the system in place, with mounting kits for valance panels also available. When mounting a curtain system, we recommend installing track supports for every 1 m of track for ceiling supports and every 1.2 m of track for floor supports. Please contact Thorlabs Tech Support with any questions about how to configure a system for your lab.
Due to different building codes, material types, and room designs, we do not include any hardware needed to mount the system to floors, ceilings, or walls. Please be aware of the overall weight of the mounted system and choose screws and fittings that are suitable and have enough holding strength for use in your wall or ceiling. If you are uncertain, please consult a specialized retailer.
CAUTION: These blackout curtains are not certified to provide laser protection.
| Blackout Components Selection Guide | |||
|---|---|---|---|
| Blackout Curtain System | Blackout Materials | Optical Enclosures | Lens Tube Covers |
| Fire Retardance Testing |
|---|
| Certifications |
| BS 5867 |
| NFPA 701, As Received |
| NFPA 701, After Leaching |
Fire Retardance Testing and Conformance
BS 5867: Part 2: 2008 (2015)
The fabric used to make the curtains and valances was tested by an authorized external testing agency, in accordance with BS 5867: Part 2: 2008 (2015): Type B Curtains, Drapes and Blinds. The curtains and valances were tested in accordance with BS EN ISO 15025: Procedure A (surface ignition): 2002, and the test was performed at 20 °C and 60% relative humidity. Each sample was subjected to an applied flame using butane and a 15-second flame application time.
NFPA 701
The fabric used to make the curtains and valances was tested by an authorized external testing agency, in accordance with the National Fire Protection Association No. 701, "Standard Methods of Fire Tests for Flame Propagation of Textiles and Films, 2015 Edition, (Test 1, Small Scale)". The sample was tested as received and after 72 hours of leaching. The sample submitted meets the minimum requirements of the above standard. The average percent weight loss did not exceed 40% and the weight loss of individual specimens did not exceed mean value plus three standard deviations. The average residual flame did not exceed 2.0 seconds.
DISCLAIMER
The blackout curtain and valance materials have been tested individually by a third party. Due to manufacturing variances, mechanical wear, or damage, Thorlabs assumes no responsibility for curtain or valance failure. Please ensure that these blackout curtains are suitable for your application. Inspect each curtain before each use and ensure that it is in excellent condition. These blackout curtains and valances are not certified to provide laser protection.
Click to Enlarge
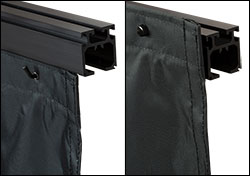
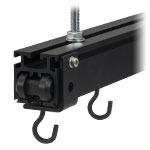
Curtain panels can be mounted on wheel runners for quick and easy curtain adjustment, or they can be mounted to the side of the rail for blocking light and keeping the panels in a fixed position.
The modular design of Thorlabs' blackout curtain system allows them to be easily customized to fit into most labs. Example configurations are shown below with links that provide information about which Item #s are used. Each example shows a 2.29 m (7.51') tall blackout curtain mounted in a room with a standard ceiling height of 8'. In the models below, note that the ceiling is removed to show the layout of the parts. Depending on the room design and ceiling height, different or additional mounting hardware may be required; please contact Tech Support if assistance is needed.
Curtain panels can be mounted on the side of a curtain rail using Item # LPCLT1 or underneath the rail on wheel runners using Item # LPC07 (see image to the right). The configurations modeled below show a variety of panels mounted either way. Note that the length from the top of the rail to the bottom of the curtain will differ depending on how the curtain is attached. When side mounted, the approximate length is 2274 mm. When mounted using the wheel runners, the approximate length is 2327 mm.
When constructing a curtain system, we recommend ordering enough curtains so that the curtains' combined width is roughly 7-10% longer than the overall length of the curtain tracks. This allows the curtains to be draped along the length of the track, ensuring that the lab area will be properly enclosed. The curtains can be connected with a light-tight seal using hook-and-loop fasteners that are sewn along each edge. When mounting a curtain system, we recommend installing track supports for every 1 m of track for ceiling supports and every 1.2 m of track for floor supports.
Due to different building codes, material types, and room designs, we do not include any hardware needed to mount the system to floors, ceilings, or walls. Please be aware of the overall weight of the mounted system and choose screws and fittings that are suitable and have enough holding strength for use in your wall, ceiling, and floor. If you are uncertain, please contact a specialized retailer. Please contact Tech Support with any questions about how to configure a system for your lab.
Example 1: Corner of Lab Click to Enlarge The above example configuration is provided to show how our modular blackout curtain system can be used in the corner of a lab. This specific example is designed to fit around a 1.2 m x 2.5 m optical table. Click the "View Product List" link above to view all of the items used in this assembly. |
Example 2: Central Area in Lab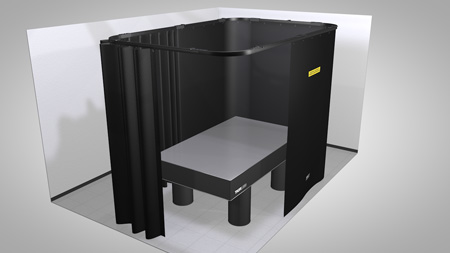 Click to Enlarge The above example configuration is provided to show how our modular blackout curtain system can be used in the center of a lab. This specific example is designed to fit around a 1.2 m x 2.0 m optical table. Click the "View Product List" link above to view all of the items used in this assembly. |
Example 3: Split Lab Space into Three Sections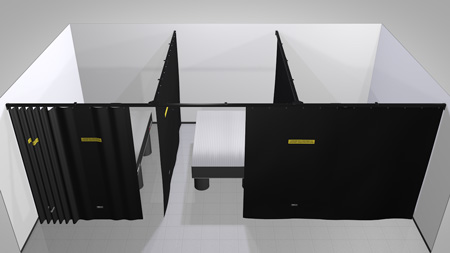 Click to Enlarge The above example configuration is provided to show how our modular blackout curtain system can be configured to divide a lab into three sections. Each of the three sections in this example is designed to fit around a 1.2 m x 2.5 m optical table. Click the "View Product List" link above to view all of the items used in this assembly. |
Example 4: Split Lab Space into Four Sections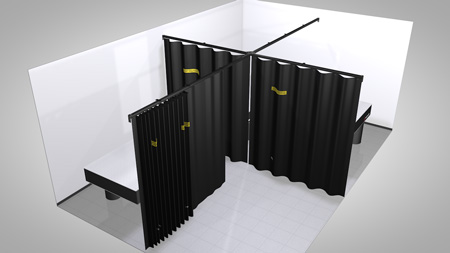 Click to Enlarge The above example configuration is provided to show how our modular blackout curtain system can be configured to divide a lab into four sections. The right and front walls are removed for clarity. Each of the four sections in this example is designed to fit around a 1.2 m x 2.5 m optical table. Click the "View Product List" link above to view all of the items used in this assembly. |
Example 5: Central Area in Lab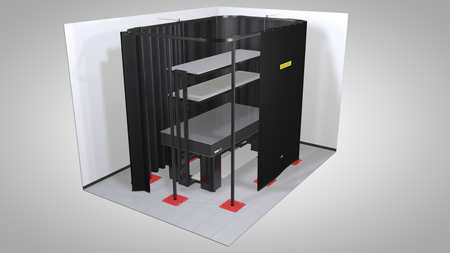 Click to Enlarge The above example configuration is provided to show how our modular blackout curtain system can be used to isolate a central area in a lab. This specific example is designed to fit around a 1.2 m x 2.0 m optical table. Click the "View Product List" link above to view all of the items used in this assembly. |
Example 6: Dividing a Lab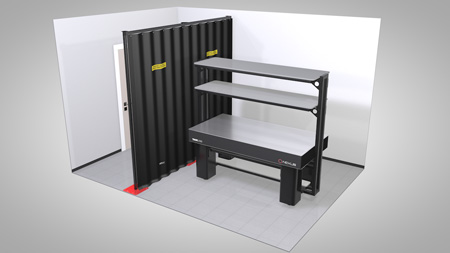 Click to Enlarge The above example configuration is provided to show how our modular blackout curtain system can be used to divide sections of a lab. This specific example block light from the lab's entryway. Click the "View Product List" link above to view all of the items used in this assembly. |
| Posted Comments: | |
user
(posted 2018-10-11 19:03:26.16) This page is more difficult to understand than to pass exam of physics. rmiron
(posted 2018-10-12 10:18:59.0) Response from Radu at Thorlabs: Thank you for your feedback. We are always looking to improve the way information is presented on our website. If you have any specific suggestions regarding how we could re-organise the page, please post them here or email them over and me or my colleagues will make sure that they reach our web team. |

Click to Enlarge
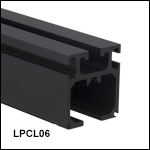
Each track contains a top channel for mounting adapters, two side channels for end stops and T-nuts, and one bottom channel for wheel runners.
Click to Enlarge
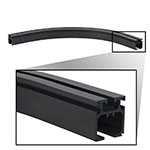
LPCC90 Curved Track
Curtain tracks are available with seven length options to choose from, including a curved, 90° track. Dedicated wall, ceiling, or floor mounting adapters are also provided to secure the system in place. When mounting a curtain system, we recommend installing track supports for every 1 m of track for ceiling supports and every 1.2 m of track for floor supports. Please contact Thorlabs Tech Support with any questions about how to configure a system for your lab.
These aluminum curtain tracks provide a path for our blackout curtain panels to follow; see the table below for all of the options available. The top channel is designed for track connectors and wall/ceiling/floor mounting adapters while the bottom channel accepts wheel runners, which hold our blackout curtains. For proper operation of the tracks, the bottom channel should not be obstructed. The side channels are sized to mount our LPC05 curtain end stops and LPCLT1
T-nuts, which can mount curtain panels onto the side of the track.
Tracks can be attached in series using track connectors, available below. Each rail has two dowel pin holes by the bottom channel to ensure proper alignment (dowel pins are included with the track connectors).
| Track Options | |||||||
|---|---|---|---|---|---|---|---|
| Item # | LPCL06 | LPCL08 | LPCL10 | LPCL12 | LPCL14 | LPCL16 | LPCC90 |
| Type | Straight | ||||||
| Track Length | 0.6 m (1.97 ft) |
0.8 m (2.63 ft) |
1.0 m (3.28 ft) |
1.2 m (3.94 ft) |
1.4 m (4.59 ft) |
1.6 m (5.25 ft) |
0.64 ma (2.09 ft)a |

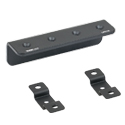
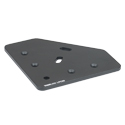
Various track connectors are provided to connect together two, three, or four curtain tracks (sold above) with our various floor, ceiling, and/or wall mounting elements (sold below) for construction of a curtain system. Most track connectors include mounting slots or additional brackets to help attach the curtain system to a wall, ceiling, or floor element. The tables list the track connectors, the type of track connection they provide, the mounting elements with which they are compatible, and additional information needed to decide the appropriate component needed for your setup.
| Track Connectors | |||||
|---|---|---|---|---|---|
| Mounting | Ceiling | ||||
| Product Photoa (Click for Details) |
 |
 |
 |
 |
 |
| Item # | LPC12 | LPC13 | LPC09 | LPC10 | LPC11 |
| Track Connection | Two-Way | 90º (Corner) | Three-Way (T-Joint) | Four-Way | |
| Additional Details | |||||

Click to Enlarge
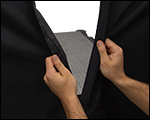
Blackout curtain panels can be joined together using hook-and-loop fasteners at the ends of each panel.

Click to Enlarge
Each blackout curtain panel features a yellow label to indicate they are not certified for laser protection.
- Hook-and-Loop Fasteners for Joining Curtain Panels Together
- Lightweight for Easy Installation
- Available in Two Sizes
- Flame Retardant
Blackout curtains are 2.29 m long and are offered in two widths: 1.45 m and 2.90 m. They can be connected to each other using hook-and-loop fasteners that are sewn along the sides of each curtain (see image to the right) to create a light-tight seal. These strips run along the length of the curtain.
Thorlabs' Blackout Curtains provide exceptional blackout performance of light at various wavelengths. The front of each curtain displays the Item #, and the front and back display a yellow warning label to indicate the curtains are not certified to provide laser protection (see image to the right). Each blackout curtain is certified flame retardant and was tested in accordance with the NFPA 701 and BS 5867 standards (see Certifications tab above for more information).
When tested with our OSL2 broadband illumination source, which emitted over the 400 - 1100 nm wavelength range with a maximum output power of 1.4 W, the blackout curtain transmitted only 0.2% of the light. This measurement was taken using our PM100D analog power meter console and S120C photodiode power sensor.
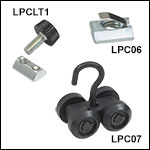
The curtains can be mounted to curtain tracks, available above, in two ways: either along the side of the track using T-nuts and thumbscrews (Item # LPCLT1, sold below in packs of 6) or underneath the track using wheel runners (item # LPC07, sold below in packs of 10). The BKC57T curtain features six eyelets, whereas the BKC114T features 12 eyelets. Note that the length of the top of the rail to the bottom of the curtain will differ depending if the panel is mounted underneath on the side of the rail. When the curtain is mounted on the side of rail, the nominal length is 2274 mm. When mounted using the wheel runners, the nominal length is
2327 mm.
When choosing a blackout curtain, we recommend ordering enough so that the combined width is roughly 7-10% longer than the overall length of the curtain tracks. This allows the curtains to be draped along the length of the track, ensuring that the lab area will be properly enclosed.
Please note that these curtain panels do not include wheel runners, a side-mounting kit, or any other accessories or additional components needed for assembling a curtain system.


Click to Enlarge
The LPC07 wheel runners enable the curtain to be mounted beneath the track, and the LPCLT1
T-nuts and thumbscrews enable the curtain to be mounted along the side of the track.
- LPCLT1: Side-Mounting Kit for Blackout Curtain Panels
- LPC07: Curtain Wheel Runners
- LPC06: Curtain T-Nuts for Mounting System Components
Accessories are available for mounting blackout curtains either on the side of the curtain tracks (Item # LPCLT1) or below the curtain tracks (Item # LPC07). We also offer T-nuts (Item # LPC06) that provide an M8 tapped hole to mount curtain system components.
LPCLT1
The LPCLT1 includes six T-nuts and six thumbscrews, which are used together, for mounting a blackout curtain onto the side of a curtain track. To do this, insert the thumbscrews in the narrow channel alongside the track with the steel ball facing inward, align the curtain's eyelets and the thumbscrews, and secure the curtain by threading in the T-nuts. Then line up the eyeholes of the blackout curtain and secure the curtain's position by threading the thumbscrews into the T-nuts. Note that the curtains position is fixed once the thumbscrews are threaded into the T-nuts.
LPC07
The LPC07 contains a pack of 10 wheel runners that are used to attach the blackout curtains to the curtain track. First, insert the wheels of the LPC07 into the bottom channel of the curtain track. Then slide the hook of the wheel runner into the eyelet of the blackout curtain.
LPC06
The LPC06 contains a pack of 10 T-nuts that can be used in the top channel of curtain track. These T-nuts effectively add M8 tapped holes to the blackout curtain track, which allows the track connectors, mounting rods, and wall/ceiling mounting brackets in our modular curtain system to be mounted.

- Valance Panels to Cover Gaps Near Ceiling of Blackout Curtain Systems
- Lightweight for Easy Installation
- Flame Retardant
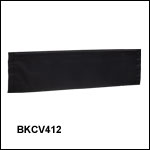
Thorlabs' Blackout Valance Panel provides exceptional blackout performance of light at various wavelengths. These valance panels are designed to cover any gaps near the ceiling or curtain track in blackout curtain systems. The back of each panel displays the Item # on a product information label. Each blackout valance is certified flame retardant and was tested in accordance with the NFPA 701 and BS 5867 standards (see Certifications tab above for more information).
When tested with our OSL2 broadband illumination source, which emitted over the 400 - 1100 nm wavelength range with a maximum output power of 1.4 W, the blackout valance transmitted only 0.2% of the light. This measurement was taken using our PM100D analog power meter console and S120C photodiode power sensor.
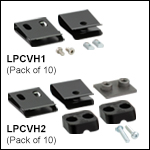
Two separately available kits allow for the valance panels to be mounted on both curtain tracks and mounting rods. It is recommended that at least two mounting clips are used to support each valance panel, with an additional clip used when installing the panels on a curved track. Each kit also comes with a set of 10 connector clips, which can be used to secure overlapping valance panels to each other, preventing gaps in coverage. Please see the manual for detailed mounting instructions.
When ordering blackout valance panels, we recommend ordering enough so that valance panels can overlap by roughly 10 cm to prevent any gaps in coverage and ensure the lab area is properly enclosed. If using a connector clip to secure the panels together, then a 15 cm overlap will be required to allow the rigid support bars of each valance panel to overlap.
Please note that these valance panels do not include any other accessories or additional components needed for assembling a curtain system.

| Included Hardware | |
|---|---|
| LPCVH1 | LPCVH2 |
| Mounting Clip (x10) | |
| Connector Clip (x10) | |
| M4 Cap Screw (x20) | M6 Screw (x20) |
| M4 Drop-In T-Nut (x20) | Clamp Body (x10 Pairs) |
| Clamp Base (x10) | |
| 2.5 mm Hex Key (x1) | 4 mm Hex Key (x1) |
- Two Kits for Mounting Valance Panels
- LPCVH1: Compatible with Curtain Tracks
- LPCVH2: Compatible with Mounting Rods
- Each Kit Supports Installation of 10 Mounting Clips for Mounting up to 5 Valance Panels
- Connector Clips allow Panels to Securely Overlap
Thorlabs' Valance Mounting Hardware Kits allow our valance panels to be installed in curtain systems that use our curtain tracks or curtain mounting rods. Each kit comes with 10 mounting clips to support the valance panels, as well as 10 connector clips which allow valance panels to be securely overlapped to prevent gaps in coverage. It is recommeded that two clips are used to support each panel, with an additional clip needed when installing on a curved track. An appropriate hex key is also included.
The LPCVH1 Track Mounting Kit is designed for use with our curtain tracks. This kit comes with 20 M4 drop-in T-nuts, which can be inserted into the side channel of the curtain tracks to accept the included M4 cap screws. Two screws can then be used to secure a mounting clip, which will help support the valance panels. The kit allows for a total of 10 mounting clips to be installed for mounting of up to five valance panels.
The LPCVH2 Rod Mounting Kit is designed for installation on our LPC02 mounting rods. This kit comes with 10 pairs of clamp bodies, which are each secured around a mounting rod by actuating two M6 screws throught the clamp body pair and into a clamp base. These screws can then be used to secure a mounting clip to support the valance panel. Each kit allows for 10 mounting clips to be installed to support mounting up to five valance panels. If the addition of valance panels necessitates additional support in a rod-mounted system, more LPC02 mounting rods are available separately on this page.
Please see the manual for detailed mounting instructions.

| Included Hardware | |
|---|---|
| Base | Columns |
| M8 Cap Screw (x2) | N/A |
| M8 Washer (x2) | |
| Specifications | |
|---|---|
| Item # | Height |
| LPCFC7 | 2200.0 mm (86.61") |
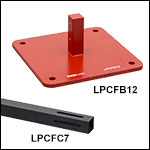
- Mounting Base to Affix Curtain System to a Floor
- Painted Red to Increase Visibility When Working
- Mounting Column for Floor Mounting Curtains
- Attaches To LPCFB12 Base Using Included M8 Cap Screws
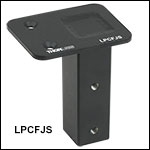
- Mount LPCFJS Track Support and Select Track Connectors
- Hardware Used to Fix Mounting Base to Floor Not Included*
The LPCFB12 Mounting Base is used to mount the modular curtain system to the floor. Each base accepts an LPCFC7 mounting column, which can be used with our blackout curtain panels. The mounting columns can then accept a track support or track connector to start forming the frame of the system. The mounting column attaches to the mounting base using a 6 mm hex key (not included) and included M8 cap screws and washers.
We recommend a support column and base for every 1.2 m of track.
*Due to different building codes, material types, and room designs, hardware to mount this system to floors is not included with any of our curtain system products. Please choose screws and fittings which are suitable for use in your floor and have enough holding power. For reference, chosen hardware should be able to withstand shear forces of approximately 30 N (6.7 lbf) and tensile forces of approximately 440 N (98.9 lbf). If you are uncertain, please contact a local specialized retailer. It is not recommended to use this system before bolting the base plates to the floor.

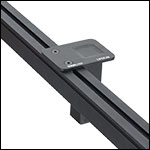
Click to Enlarge
LPCFJS Support Shown Attached to a Curtain Track
| Included Hardware | |
|---|---|
| M6 Cap Screw (x2) | |
| M8 Cap Screw (x2) | |
| M8 Washer (x2) | |
| Half Joint Plate |
- Supports a Single Curtain Track
- Attaches Directly to a Mounting Column Using Included M8 Cap Screws
- Attaches to Top Channel of Curtain Track for Support Using Included M6 Cap Screws
The LPCFJS Rail Support is used to provide additional support for the tracks. The LPCFJS attaches to the LPCFC7 mounting column (sold above) using a 6 mm hex key (not included) and included M8 screws. It then attaches to a curtain track using a 4 mm hex key (not included) and included M6 screws.
When floor mounting a curtain system, we recommend the use of a floor mounted support every 1.2 m.

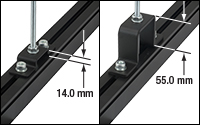
Click to Enlarge
The LPC04 and LPC16 allow vertical adjustment of the track, when using the LPC02 rod, by an amount equal to or less than the track-to-ceiling separation of the bracket.
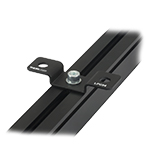
Click to Enlarge
LPC04 Mounted on a Track so that it can be Attached 14.0 mm from a Ceiling
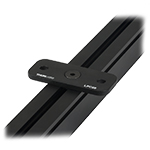
Click to Enlarge
LPC08 Mounted on a Track so that it can be Attached 6.0 mm from a Ceiling
| Included Hardware | ||
|---|---|---|
| LPC08 | LPC04 | LPC16 |
| M8 Countersunk Cap Screw (x1) | M8 Cap Screw (x2) | |
| M8 T-Nut (x1) | M8 T-Nut (x2) | |
| M8 Washer (x2) | ||
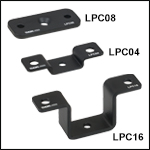
- Mounting Brackets for Attaching a Curtain Track to a Ceiling
- LPC08: 6.0 mm Track-to-Ceiling Separation
- LPC04: 14.0 mm Track-to-Ceiling Separation
- LPC16: 55.0 mm Track-to-Ceiling Separation
- Can be Attached to a Ceiling Using the LPC02 Mounting Rod (Available Below)
- Attaches to Curtain Track Using Two Included M8 Cap Screws and T-Nuts
- Hardware Used to Fix Brackets to the Ceiling is Not Included*
These mounting brackets are used to attach a curtain track to a ceiling. Each bracket attaches to the top-located channel of the curtain tracks using a 6 mm hex key (not included) and included M8 cap screws and T-nuts with the center through hole. This allows the track to be positioned before it is secured in place. Three versions are available, each offering a different track-to-ceiling separation: LPC08 (6.0 mm separation), LPC04 (14.0 mm separation), and LPC16 (55.0 mm separation).
The LPC08, LPC04, and LPC16 each have two through holes, offset from center, that are used to attach the brackets directly to the ceiling. These through holes can also be used with the LPC02 Off-Ceiling Mounting Rod, available below, which allows the curtain track to be mounted up to 2 m below the ceiling. Additionally, when the LPC02 is used with the LPC04 and LPC16, the tracks can be vertically adjusted on the rod by an amount equal to or less than the track-to-ceiling separation of the bracket, without interfering with other components mounted on the track. An example can be seen in the photo to the far right. This adjustment range can be used to level the system or change the height at which it is mounted.
Please note that we recommend adding a ceiling support for every 1 m of track to create a more stable system.
*Due to different building codes, material types, and room designs, hardware to mount these brackets to ceilings is not included. Please be aware of the overall weight of the mounted system and choose screws and fittings that are suitable and have enough holding strength for use in your wall or ceiling. If you are uncertain, please contact a specialized retailer.

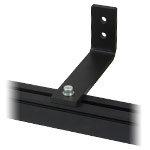
Click for Details
The LPC14 is used to hang a curtain track 138.0 mm from a support wall.
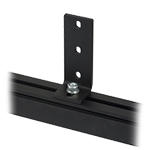
Click for Details
The LPC03 is used to hang a curtain track so that it can be flush with a support wall.
| Included Hardware |
|---|
| M8 Cap Screw (x1) |
| M8 T-Nut (x1) |
| M8 Washer (x1) |
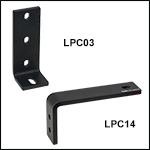
- Mount Curtain Tracks Directly to a Wall for Support
- LPC03: Track Mounted Flush with Wall
- LPC14: Track Mounted 138.0 mm from Wall
- Attaches to Curtain Track Using M8 Cap Screw and T-Nut (Included)
- Hardware Used to Fix Brackets to a Wall is Not Included*
The LPC03 and LPC14 Mounting Brackets are used to attach a curtain track flush with or
138.0 mm from a wall, respectively. Each bracket attaches to the top-located channel of the curtain tracks using a 6 mm hex key (not included) and included M8 cap screw and T-nut, allowing the track to be positioned before it is secured in place. See the images to the right for details.
The LPC03 bracket includes three Ø6.8 mm x 10.0 mm through slots and the LPC14 includes two Ø9.0 mm through holes so that they can be mounted to a wall*.
*Due to different building codes, material types, and room designs, hardware to mount these brackets to a wall is not included. Please be aware of the overall weight of the mounted system and choose screws and fittings that are suitable and have enough holding strength for use in your wall or ceiling. If you are uncertain, please contact a specialized retailer.

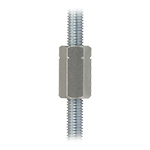
Click to Enlarge
An adapter is included so that the two rods can be attached. This is ideal when the system needs to be attached to higher ceilings.
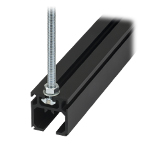
Click to Enlarge
An M8 threaded T-nut is included so that the rods can be directly attached to a curtain track.
| Included Hardware |
|---|
| M8 Cap Screw (x1) |
| M8 Nut (x5) |
| M8 T-Nut (x2) |
| M8 Adapter Nut (x1) |
| M8 Washer (x4) |
- Ideal for Mounting Curtain Tracks to High Ceilings
- Prevent System Sway when Used with Curtain End Stop Brackets
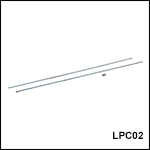
- Two Externally M8 x 1.25 Threaded, 1.0 m Long Steel Rods Included
- 24.0 mm Long, Internally M8-Threaded Adapter Included to Connect Rods
- Hardware Used to Fix Rods to the Ceiling is Not Included*
The LPC02 Mounting Rod is designed to mount curtain tracks to a high ceiling for support. It can also be attached to a curtain end stop bracket to attach to a far wall to prevent system sway. Please note that the rod is only designed to hold axial loads and should not be used to support loads when mounted horizontally. The LPC02 includes two 1.0 m long steel rods, one 24.0 mm long thread adapter to connect the rods, and mounting hardware, listed in the table to the left, to attach the rod to a curtain accessory.
When mounting to the ceiling, the LPC02 can be attached directly to the top channel of the curtain tracks using the included M8-T-nut or it can be attached to an end stop bracket, available below, using the included M8 lock nuts. When mounting to a wall, the LPC02 will need to be attached to a wall mounting bracket, available above, using the included lock nuts. Please see the manual for detailed wall and ceiling mounting instructions.
Please note we recommend adding a ceiling support for every 1 m of track to guarantee a stable system.
*Due to different building codes, material types, and room designs, hardware to mount these rods to walls or ceilings is not included. Please be aware of the overall weight of the mounted system and choose screws and fittings that are suitable and have enough holding strength for use in your wall or ceiling. If you are uncertain, please contact a specialized retailer.


Click to Enlarge
End Stop Shown Attached to the Side of a Curtain Track to Stop the Movement of the Wheel Runners
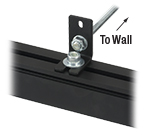
Click to Enlarge
The LPC05 shown attached to the top of a track with an LPC02 to create a horizontal restraint that prevents swaying of the system.
| Included Hardware |
|---|
| M4 Cap Screw (x2) |
| M4 Drop-In T-Nut (x2) |
| M4 Washer (x2) |
- Provides a Hard Stop for Curtain Panels
- Attaches to the Side Channels of the Curtain Track Using the Provided M4 Cap Screw and T-Nut
- Can be Placed at Any Location Along the Curtain Track
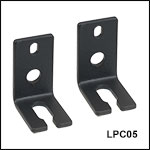
The LPC05 is used to provide a hard stop for a curtain mounted to a track. As shown in the image to the right, it is designed to attach to the side channel of the curtain track using the provided drop-in nut and M4 cap screw. The drop-in nut can be placed into the channel from anywhere on the track; it does not need to be slid in on the end of the track.
When the curtain's wheel runner is in place, the end stop can be positioned with the bottom slot around the hook of the wheel runner. The end stop and held wheel runner can then be adjusted along the length of the curtain track by loosening the M4 cap screw that secures the end stop in place.
The LPC05 can also be attached to the top channel of the curtain track to provide additional wall support for the curtain system. See the image to the right for details and the manual for specific, step-by-step mounting instructions.
 Products Home



 Zoom
Zoom

 Blackout Curtain System